
Deploy an MLflow model to local environment and Docker
Introduction
Azure might be very expensive to deploy predictive models into their servers. For that reason I’ll show you how to deploy a predictive model to a local environment and dockerize it using the artifact created by Azure AutoML.
Prerequisites
You’re going to need to run AutoML in Azure with some dataset and to download the best model into your compute instance environment.
Download the artifact locally
An "artifact" is a component that results after training a model. The artifact contains the trained model along with the necessary libraries to reuse it. This artifact is the model that is ready to be deployed to a production environment. In a next article I will talk about how to obtain the artifact.
For this case, we will use the artifact created to solve the multilabeling task.
To download this artifact locally, it is necessary to already have it in our Azure environment.
We compress it with this code executed from our notebook in Azure ML:
import os
import zipfile
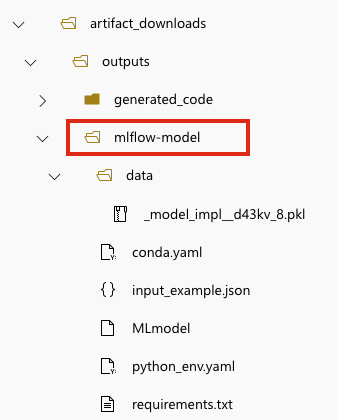
folder_to_zip = "./artifact_downloads/outputs/mlflow-model"
output_zip_file = "artifact_downloads.zip"
with zipfile.ZipFile(output_zip_file, 'w') as zipf:
for root, dirs, files in os.walk(folder_to_zip):
for file in files:
file_path = os.path.join(root, file)
arcname = os.path.relpath(file_path, folder_to_zip)
zipf.write(file_path, arcname)
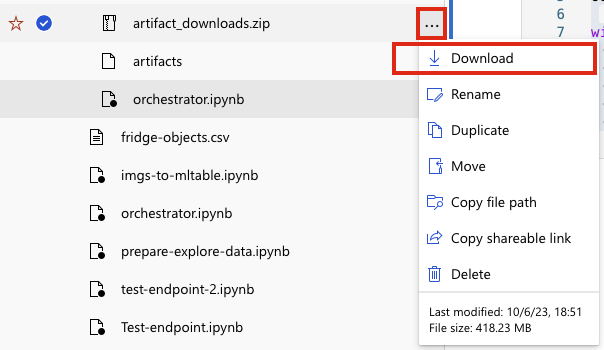
We then download the zip file into our local computer:
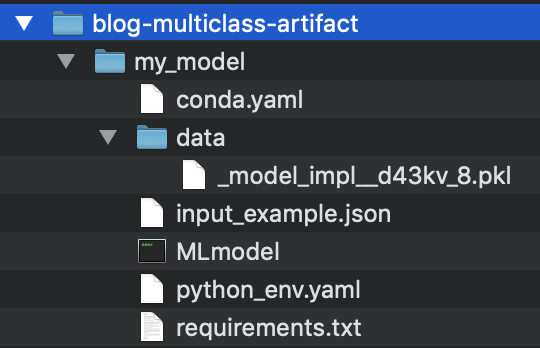
We move it into a new created directory called
blog-multiclass-artifact unzip into a folder called
my_model as it is shown in the following image:
Install MLflow
MLflow is an open-source tool that allows us to manage workflows and artifacts for the entire lifecycle of a model. For more information, click here.
It is important to mention that currently, MLflow is compatible with Python 3.10 or later. As a requirement, we need to have Python installed in our environment. In my case, I have Python 3.10 installed globally.
Open a terminal, create a Python virtual environment, and install MLflow. Alternatively, you can create a virtual environment with conda. Note that you install the same version that Azure used to create the artifact; this information is found in the MLmodel file. In my case, these commands were executed on MacOS 10.14.
    $ cd blog-multiclass-artifact
    $ python --version # 3.10
    $ python -m venv venv
    $ source venv/bin/activate # en windows: venv/bin/activate.sh
    $ pip install mlflow==2.4.2
MLflow requires virtualenv:
$ pip install virtualenv
MLflow requires having pyenv installed (for Windows, Linux, MacOS) and libomp
(MacOS or Linux) for its proper operation. Both packages are installed using the
package manager Homebrew. Click here to see how to install
Homebrew. Once installed, open a terminal and execute:
$ brew install pyenv
To see how to install pyenv on Windows, click here.
To install limbomp:
$ brew install libomp
Deploy the model locally
Deploy the model with this command:
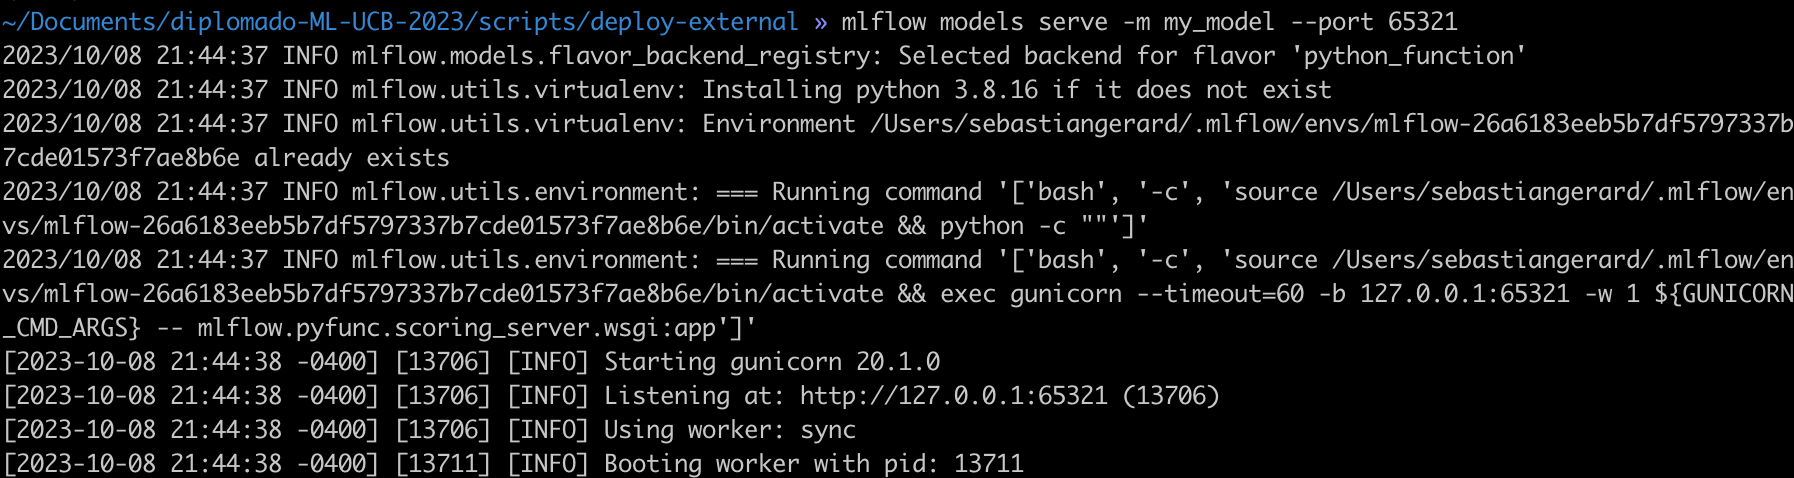
$ mlflow models serve -m my_model --port 65321
MLflow will search for a directory called my_model which contains the MLmodel
file that contains metadata about the model.
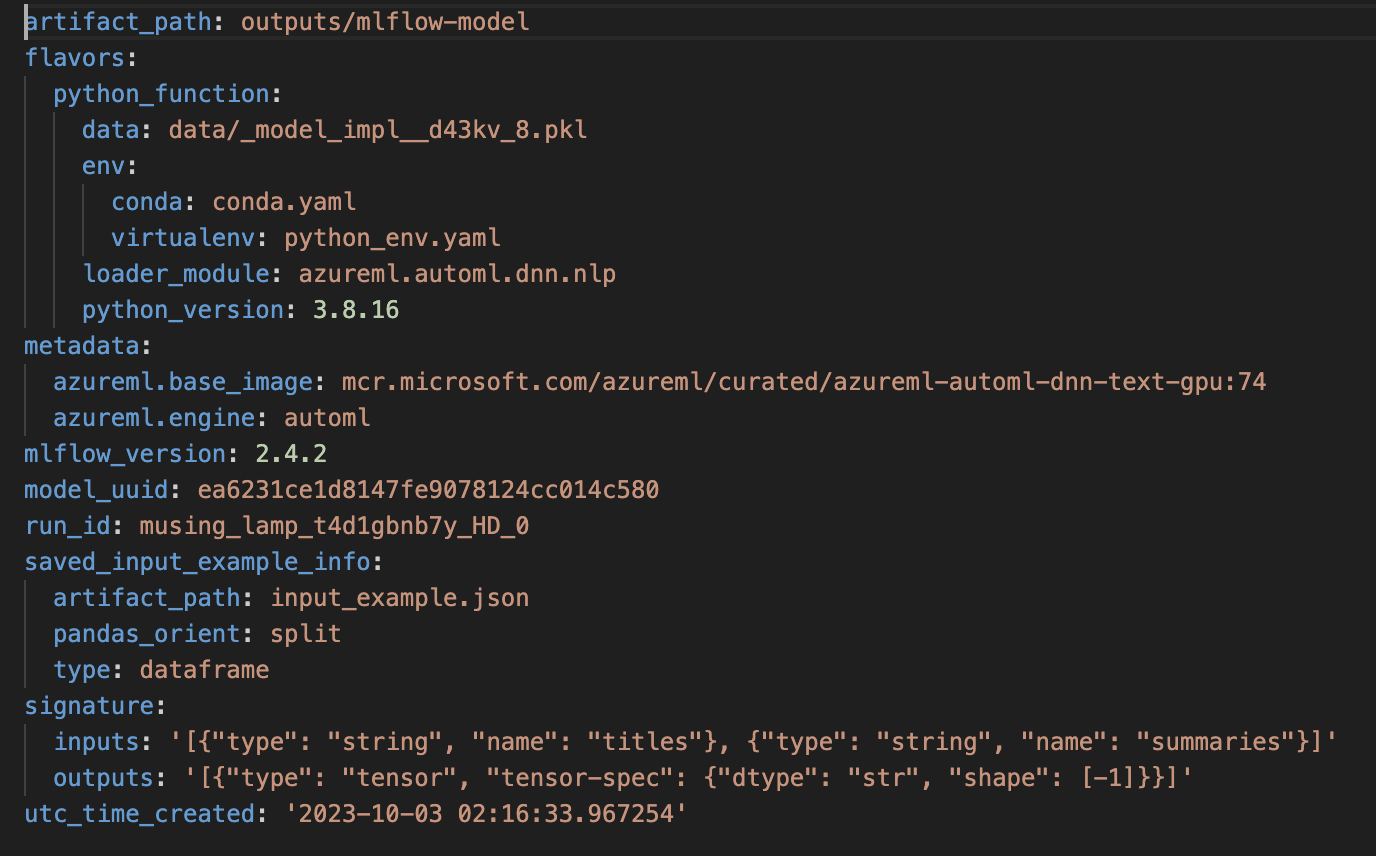
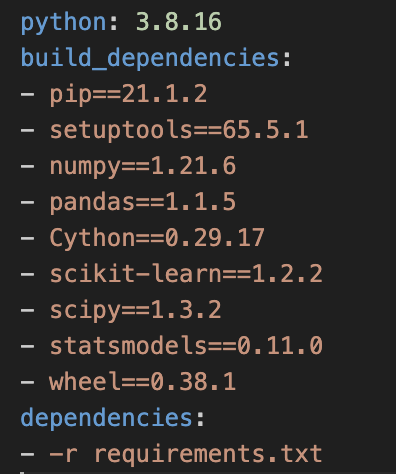
The python_env.yaml file contains information about the python
version and libraries to be installed to successfully built the project (requirements.txt).
Make sure that the port used, in this case 65321, is available and is not being used by another application. If necessary, change it to another number between 5000 and 65535.
When you run the command you should see this response indicating that the endpoint is waiting for requests:
Make Inferences
To perform an inference, simply send a POST request to
localhost:65321/invocations with the data needed to make a prediction. For simplicity we can use a curl call from the
terminal as shown below:
    $ curl -d '{"dataframe_split": { "columns": ["titles", "summaries"], \
    “data": [{"titles": "some title", "summaries": "price is \
    reasonable"}] }}' -H 'Content-Type: application/json' \
    -X POST localhost:65321/invocations
And we get the labels for the text:

Deploy the model to a Docker container
Docker is an open source platform that enables the development, delivery and the execution of applications. With Docker, it is possible to separate the infrastructure applications, facilitating agile delivery of software. This tool allows you to manage the infrastructure of the same way applications are managed. By taking advantage of the Docker practices for Deploying, testing and deploying code, can substantially reduce the time interval between writing the code and putting it into production.
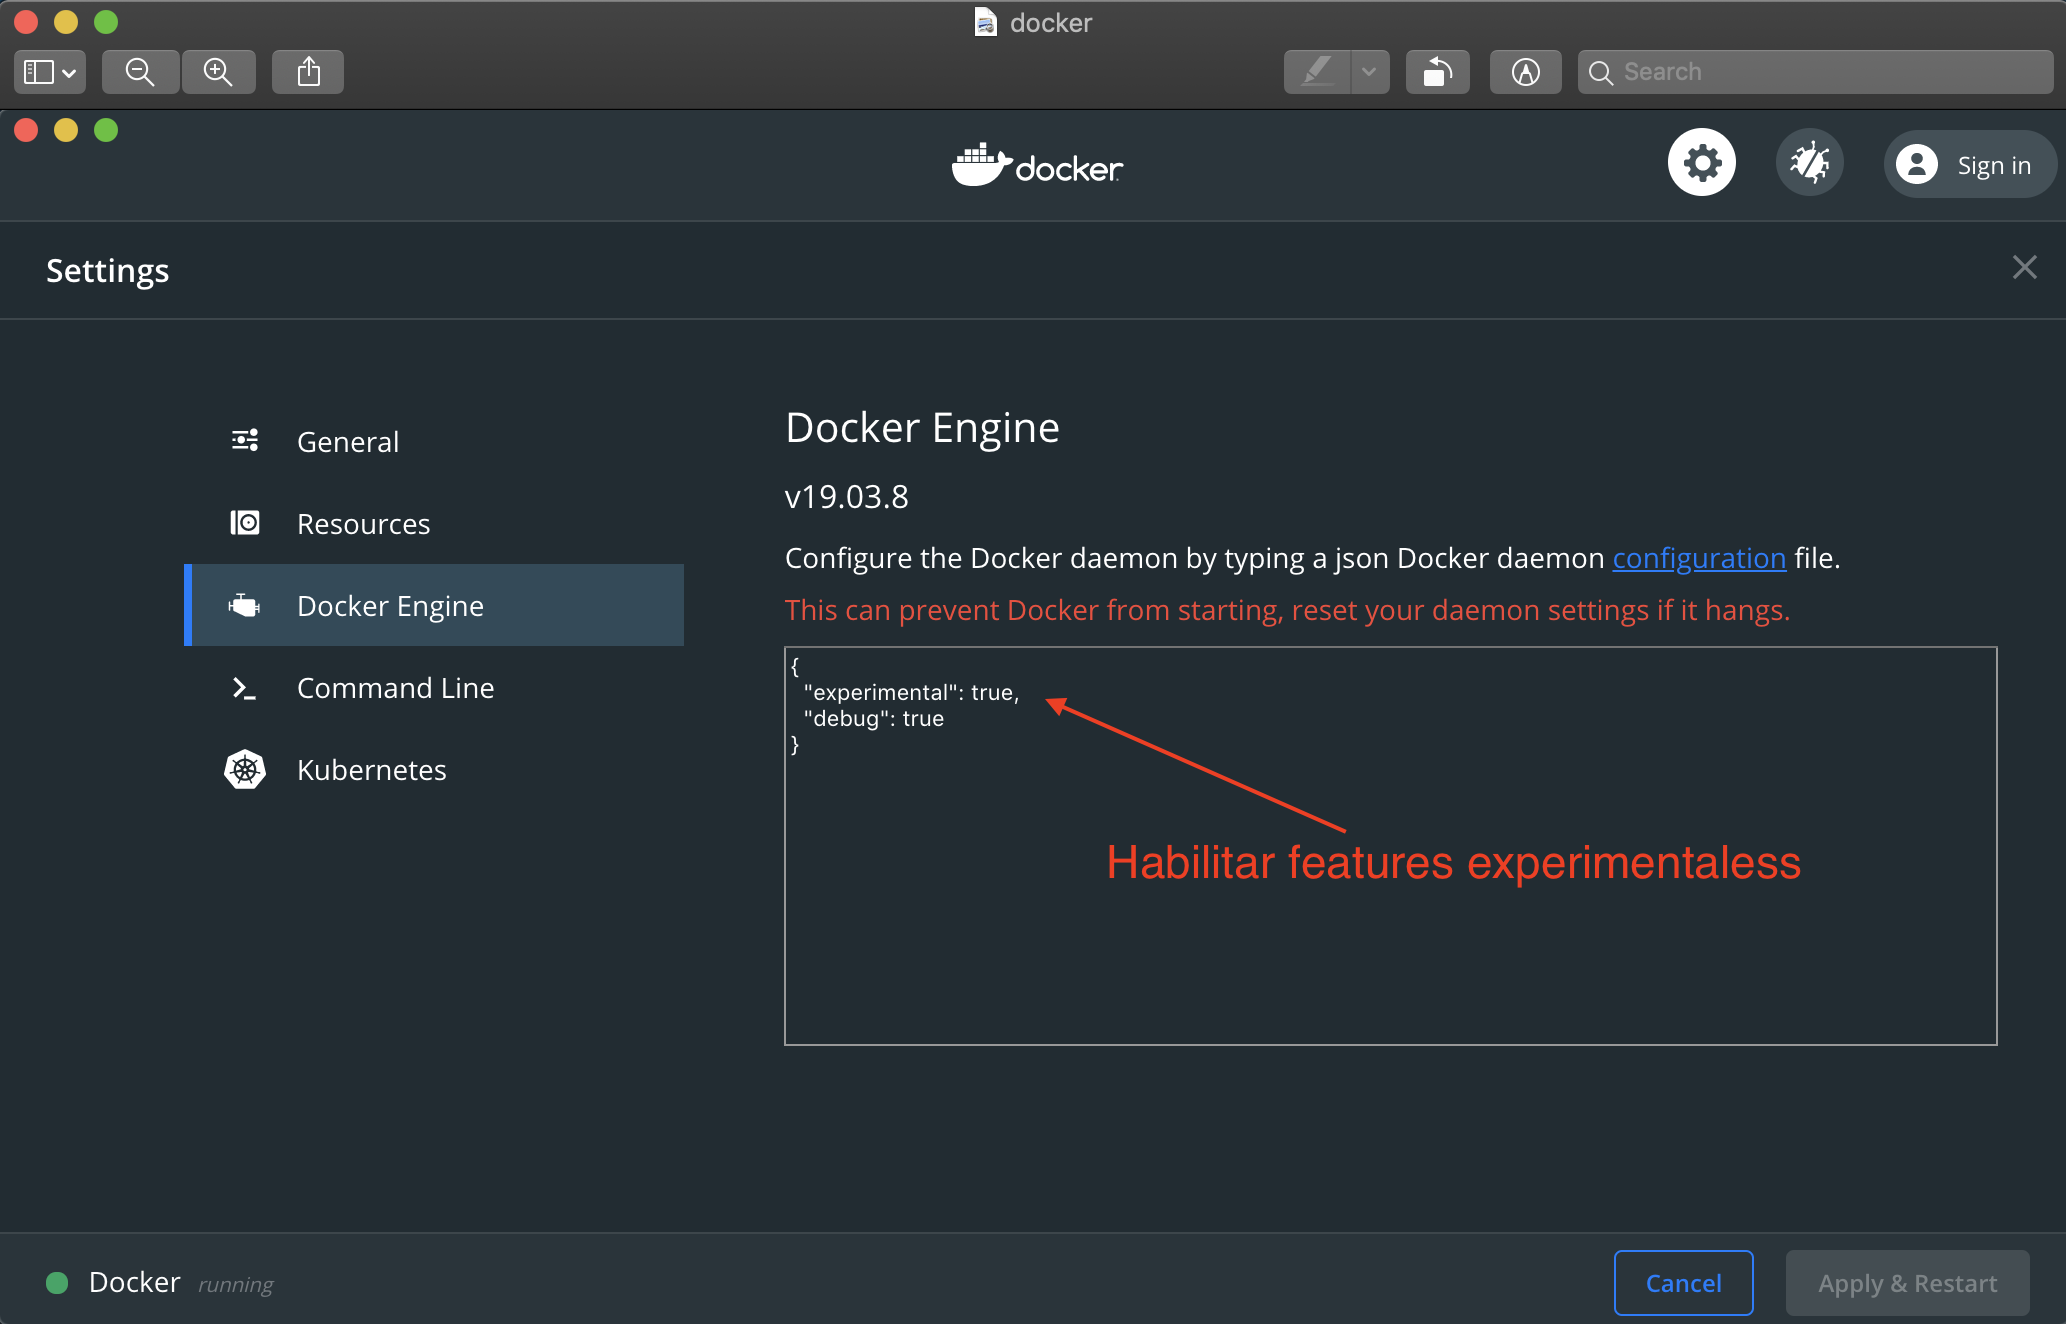
Download and install Docker Desktop and enable the experimental features:
Execute from terminal:
    $ mlflow models build-docker --model-uri my_models --name \
    “blog_multi_class_container”
This command creates a Docker image called blog_multi_class_container that contains the model and all its dependencies. Once finished running, you can perform inferences locally, on-premises, on a server or on a cloud platform. To run it locally:
$ docker run -p 5002:8080 blog_multi_class_container
This command maps port 5002 on the local machine to port 8080 on the container. To send requests you can use the same command:
    $ curl -d '{"dataframe_split": { "columns": ["titles", "summaries"], \
    “data": [{"titles": "some title", "summaries": "price is \
    reasonable"}] }}' -H 'Content-Type: application/json' \
    -X POST localhost:5002/invocations
Exercises
-
Deploy the model using the artifact provided by Azure ML on your local machine
-
Deploy the model to a Docker image
-
Deploy the model to an Azure Linux machine (See how to create this resource and access it here)
-
Deploy the Docker image to Azure (This resource can help you help)